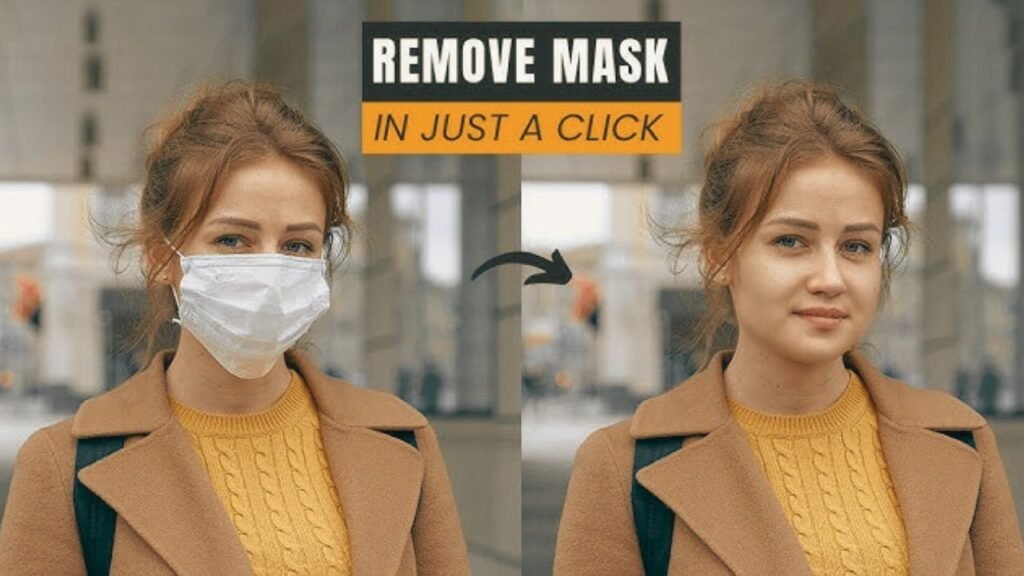
In an era where digital photography is prevalent and social media thrives, editing images for personal or professional use has become a common practice. One challenge that many people face is removing a face mask from a photo, especially in times when wearing masks has been a routine part of life.

Thankfully, advancements in technology, particularly artificial intelligence (AI), have made this process simpler. This article will provide a detailed guide on how to effectively remove a face mask from a photo.
Why Remove Face Masks from Photos?
Before diving into the ‘how,’ it’s essential to understand the ‘why.’ There are various reasons one might want to edit face masks out of images:
- Personal Use: Perhaps you want to create a memorable family portrait without masks, capturing a moment in its truest sense.
- Professional Use: For businesses, showcasing products or faces of team members might require mask removal to portray a clear and engaging image.
- Creative Projects: Artists and designers might wish to manipulate images for creative expression or visual storytelling.
Tools You Will Need
1. Photo Editing Software
While multiple tools are available, some of the most popular include:
- Adobe Photoshop: An industry-standard tool known for its comprehensive features.
- GIMP: A free, open-source alternative that still offers powerful editing capabilities.
- Canva: A user-friendly tool that provides basic editing functions and is great for quick edits.
- AI-Based Tools: Programs like Luminar AI and Fotor utilize AI to simplify the editing process.
2. High-Quality Image
Having a clear and high-resolution image will yield the best results. Avoid images that are blurry or pixelated, as these can complicate the editing process.
Step-by-Step Guide to Removing Face Masks from a Photo
Step 1: Upload Your Image
Open your chosen photo editing software and upload the image you wish to edit. Familiarize yourself with the interface if you’re using a new tool.
Step 2: Use AI-Powered Features (if available)
If your software includes AI capabilities, select the option designed for facial edits:
- Face Recognition: Some AI tools can automatically detect faces and generate adjustments accordingly.
- Mask Removal: Certain programs have dedicated features for mask removal. Explore the menus or tool panels to find these options.
Step 3: Manual Adjustments
In instances where AI may not work perfectly, you may need to refine the editing manually:
- Select the Area: Use the lasso or pen tool to carefully outline the face mask. Ensure the selection is as precise as possible to avoid affecting surrounding areas.
- Clone or Heal: Utilize the clone stamp tool or healing brush to fill in the areas where the mask was. This technique involves sampling surrounding skin textures and blending them into the selected area.
- Restoring Features: With the mask removed, you may need to enhance facial features:
- Retouching: Smooth out skin tones and textures to make the area appear natural. Avoid over-processing to maintain authenticity.
- Adjustment Layers: Use adjustment layers for brightness, contrast, and color balance to ensure the face matches the rest of the image.
Step 4: Fine-Tuning
Take a step back and view the edited image in its entirety. Zoom in to confirm that the transitions are seamless. Use tools to adjust shadows, highlights, and color grading if necessary to match the surrounding elements.
Step 5: Saving Your Work
Once you’re satisfied with the editing, save your work in the appropriate format. If you intend to share online, consider exporting in JPEG or PNG formats while maintaining a high resolution.

Challenges and Considerations
Despite technological advancements, there are challenges associated with mask removal:
1. Accuracy
AI tools currently exist within a realm of continual improvement. Depending on the software, the results can vary significantly, sometimes leading to distorted facial features or unnatural blends.
2. Complex Mask Designs
Intricate mask designs can confuse AI selections, requiring more manual corrections. Simpler designs tend to yield better results.
3. Ethical Implications
Always consider ethical implications when editing photos, especially those involving the faces of others. Obtain permission and be mindful of the potential for misinformation or misrepresentation.
Conclusion
Removing a face mask from a photo may seem daunting, but with the right tools and techniques, it can be accomplished efficiently. Whether for personal or professional use, this guide outlines a straightforward path to restoring the beauty of an unobstructed face in your images.
As AI technology continues to evolve, the future holds even greater promise for quicker and more accurate photo editing. The next time you encounter a photo with face masks, remember that with the right approach, you can bring those images.


